接口测试最近几年越来越流行了,特别是随着微服务的兴起,系统和系统之间,甚至系统内部模块之间的互相调用都开始大量使用接口了(一般采用RESTFUL风格的http调用),这就给我们的质量保证工作带来的新的机遇,在业务测试之前验证接口的正确性,将使得我们在更早的阶段发现问题,提升效率。
如果你从来没接触过接口测试,请查看:
接口测试系列
接口测试如何做呢?一般已经上线接口都会自动化掉,关于接口自动化,可以使用现成的接口框架,也可以移步我之前关于测试框架的文章,
pytest测试框架
自研测试框架ktst
对于正在开发或还未达到上线条件的接口,手工测试就必不可少。对于这部分测试,相信大家都有自己的心得,简单的接口,可以通过fiddler或者Charles模拟请求,也可以在接口请求发送前或服务器结果返回前加入断点,更改请求内容或返回内容。
但对于复杂的接口,或者需要多次定时运行,甚至接口间有先后调用顺序的接口,或者团队成员需要轮换测试不同的接口时,Postman就是唯一一个选择了。
我将分以下几个方面介绍:
1. 介绍 & 安装
2. 常见请求:
3. 变量定义,重用, 环境变量。
4. Collection
5. Conditional Workflows
6. Newman
7. 跟Jenkins集成
8. Moniter & Mock Server & API Documentation
总结起来就一句话,看完本篇,让你玩转“手工”接口测试。
1. 介绍 & 安装
什么是postman?
Postman Makes API Development Simple, so does the API testing.
自己去官网下载后安装,你可以创建一个用户,或者关闭注册窗口继续使用, 我用的企业版,直接登录后使用,你会看到如下图。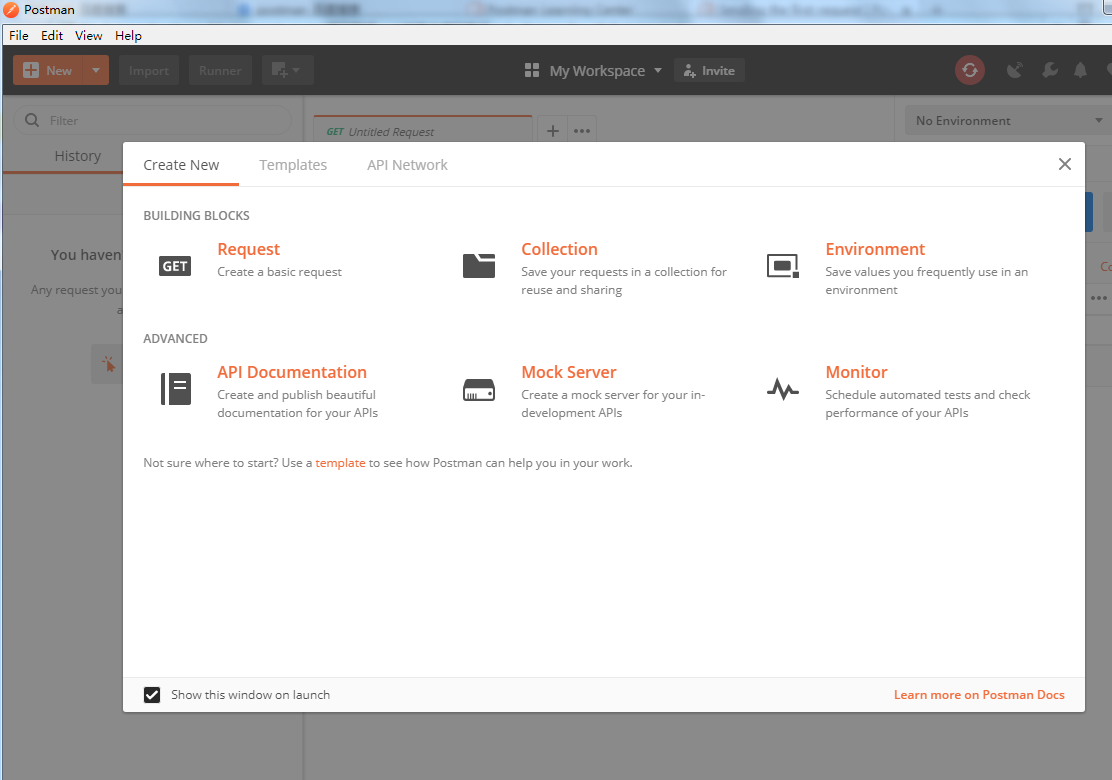
2. 常见请求:
界面左上角 “+New” -> “Request”,或者根据上图选第一个Request,创建你的第一个request:
GET:
URL里填写, 点击send request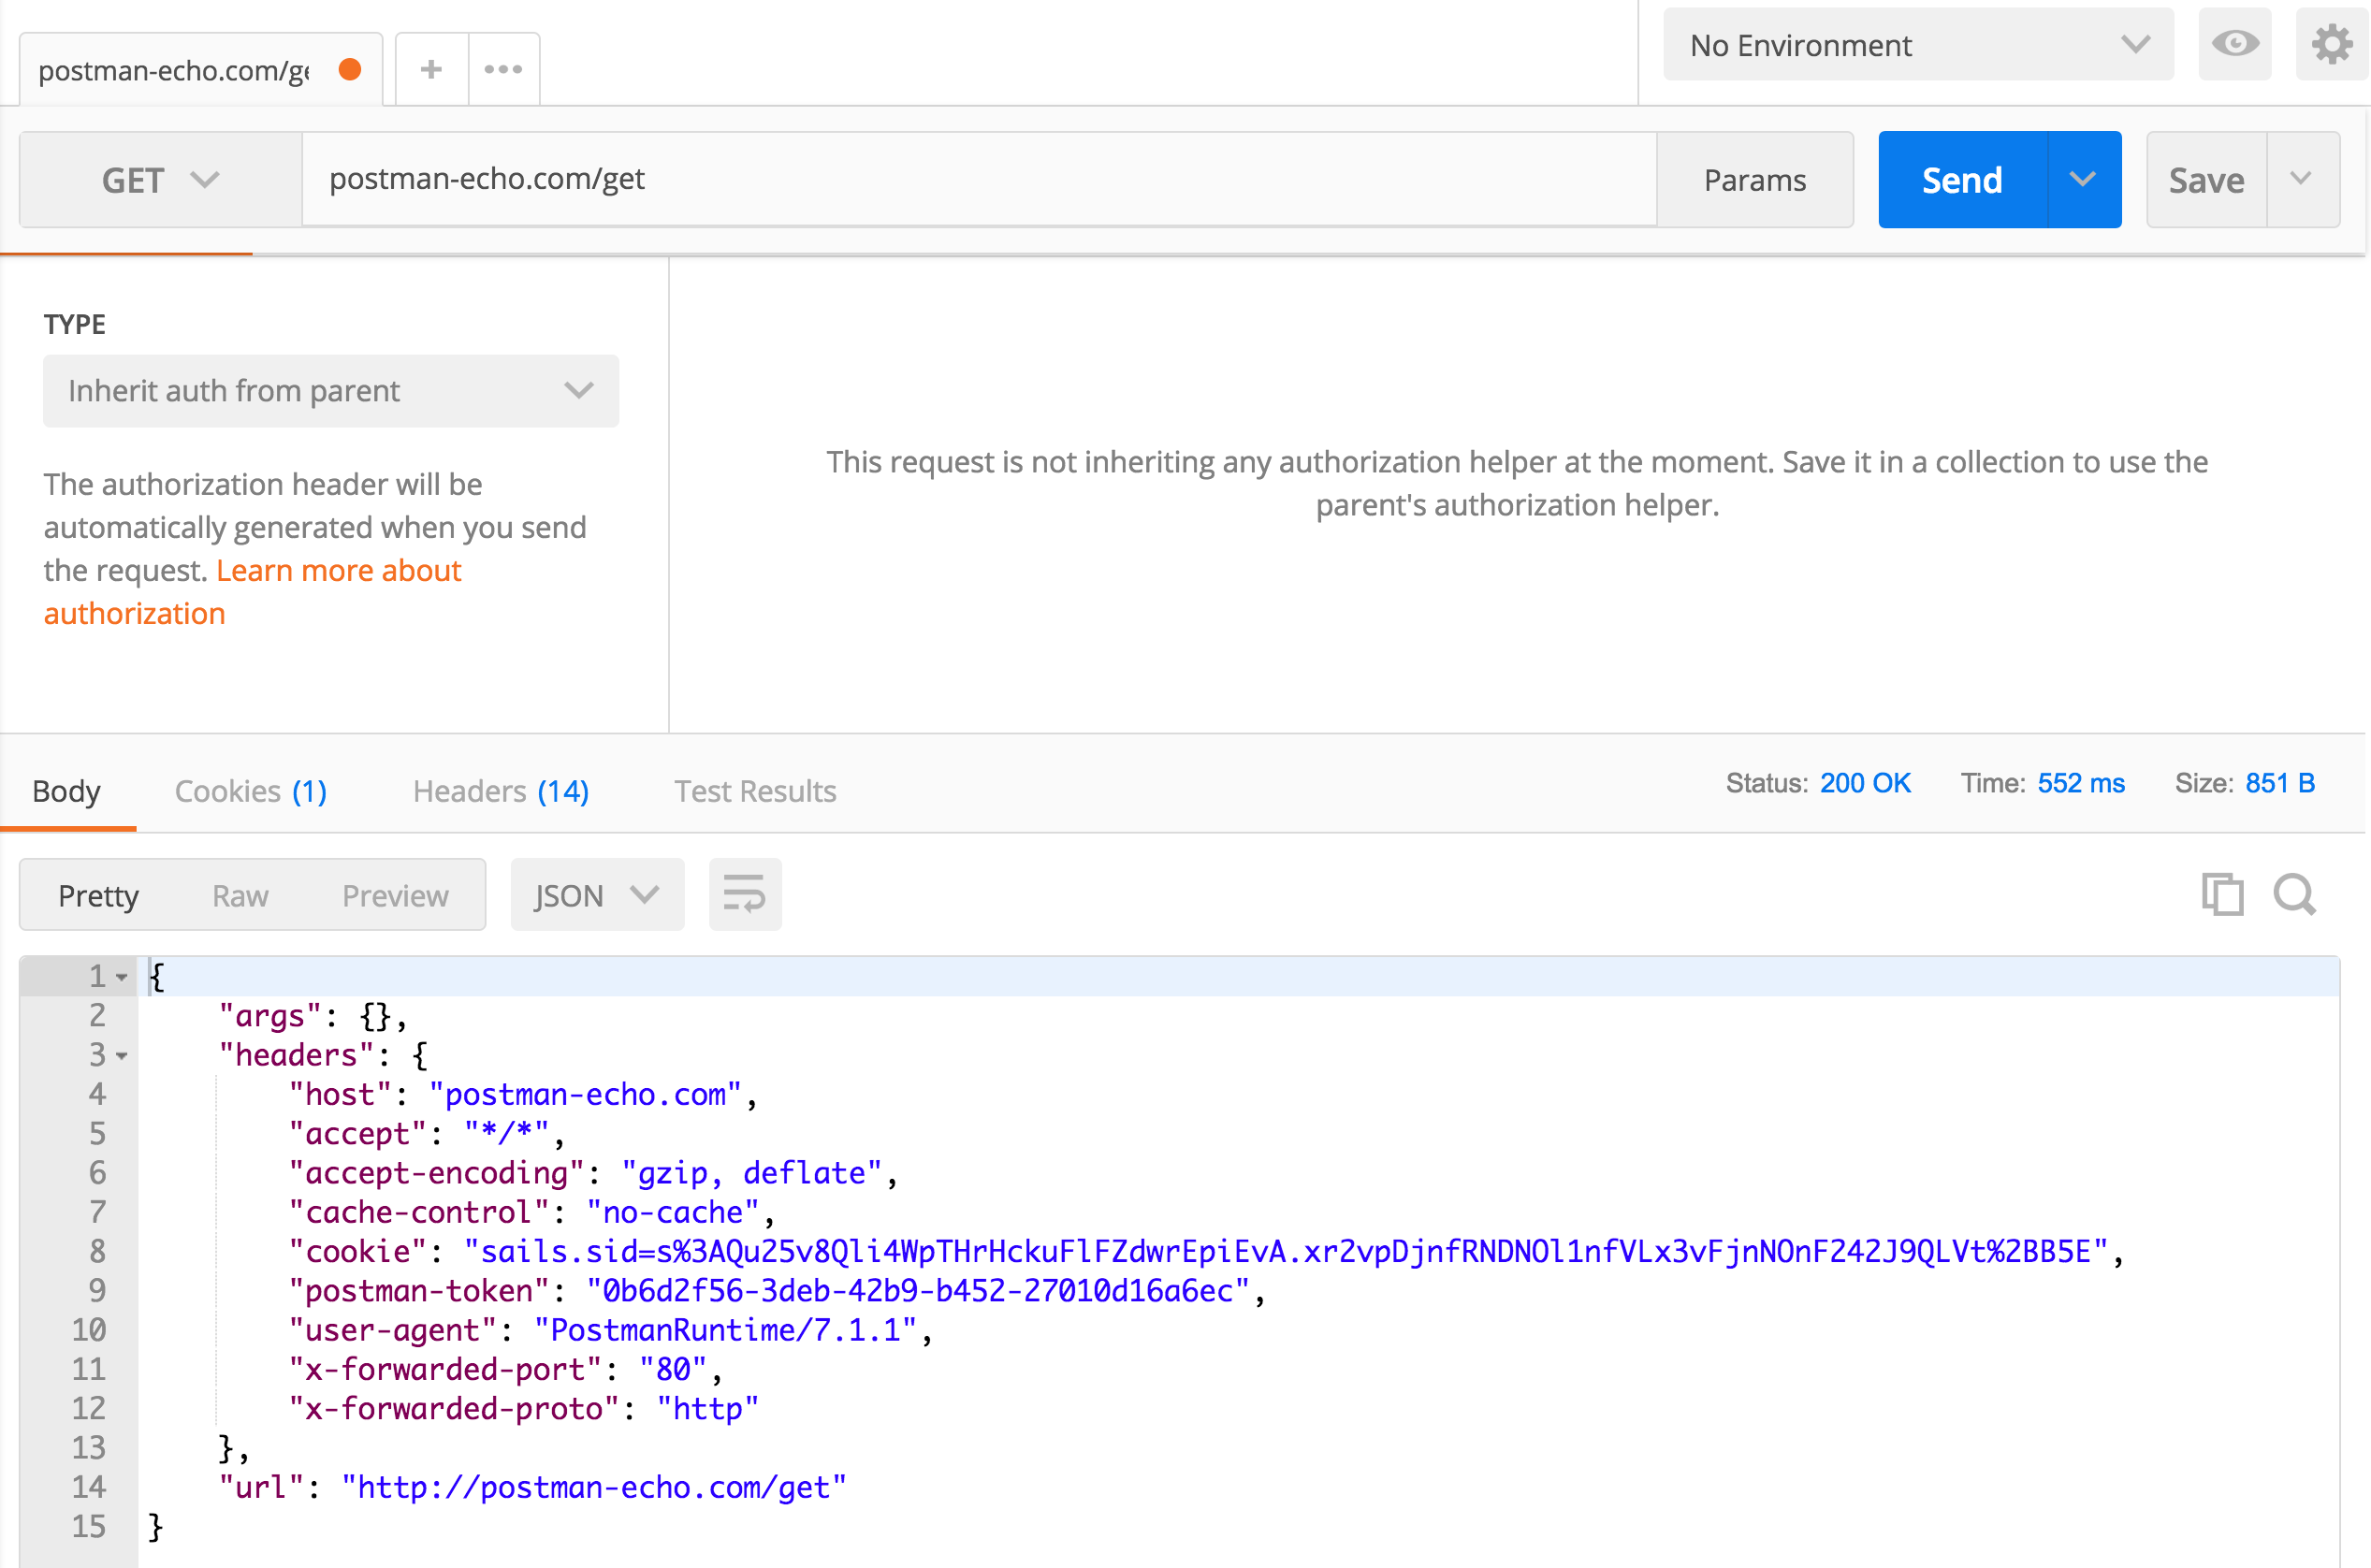
注意, get请求的参数实际上就是我们在url里看到的?后面的一串,如果有多个参数你可以在Params里添加。
POST:
对于POST类型的请求, 填写好body内容, Headers内容
一般的POST方法都需要authentication,那么你可以在Authorization里添加相应的类型(现在用Bearer Toeken较多),实际情况用什么认证需问开发。
这部分非常基础, 不展开。
3. 变量定义,重用, 环境变量 和Scripts。
一个请求常常需要用不同数据在不同测试环境测试多次,那么参数化就必不可少。
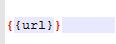
Postman里变量用

来表示。variables里面就是你的变量。Postman看到双括号就知道里面的是变量。
环境变量的定义在这里: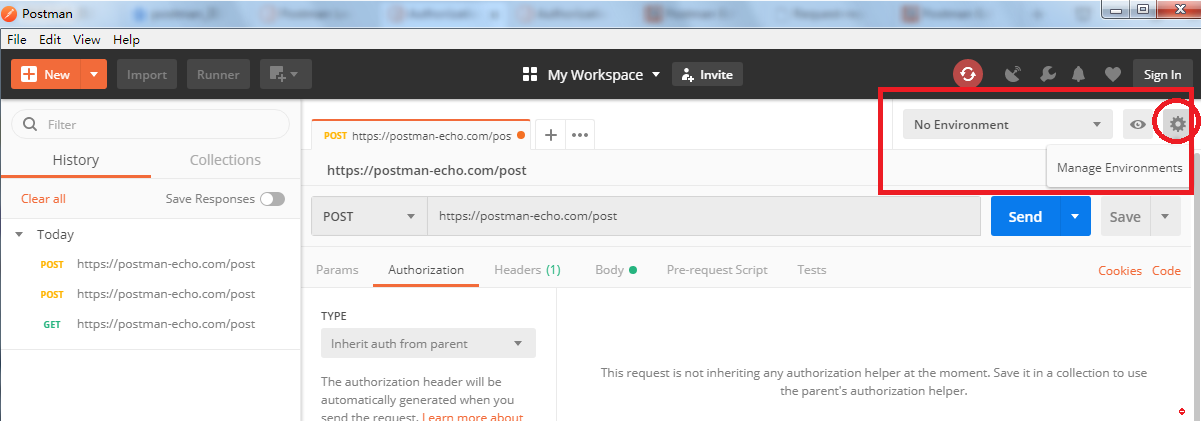
以上图的例子来说,我定义个变量名为url,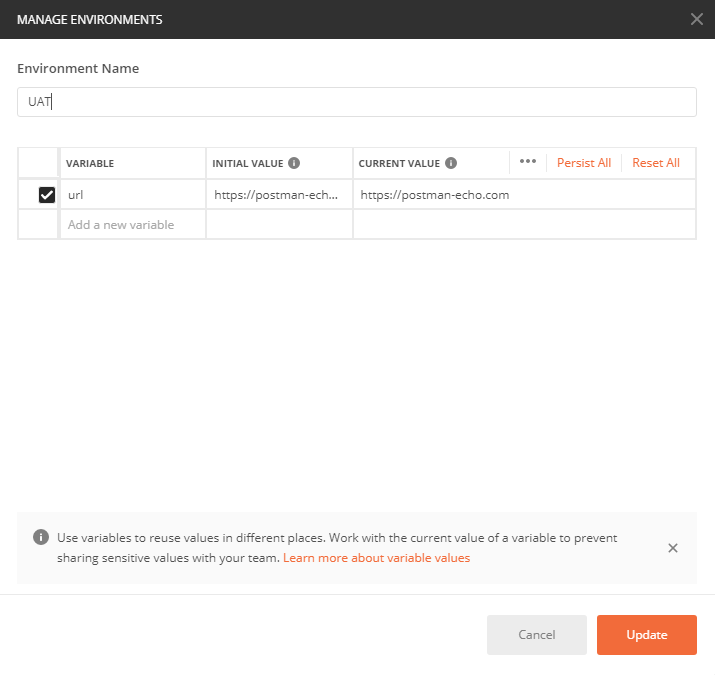
定义好后,使用上只要用如下表述就可以了。
环境变量可以导出供其它用户使用,注意环境变量是全局的,即定义好后,任何请求都可以重用。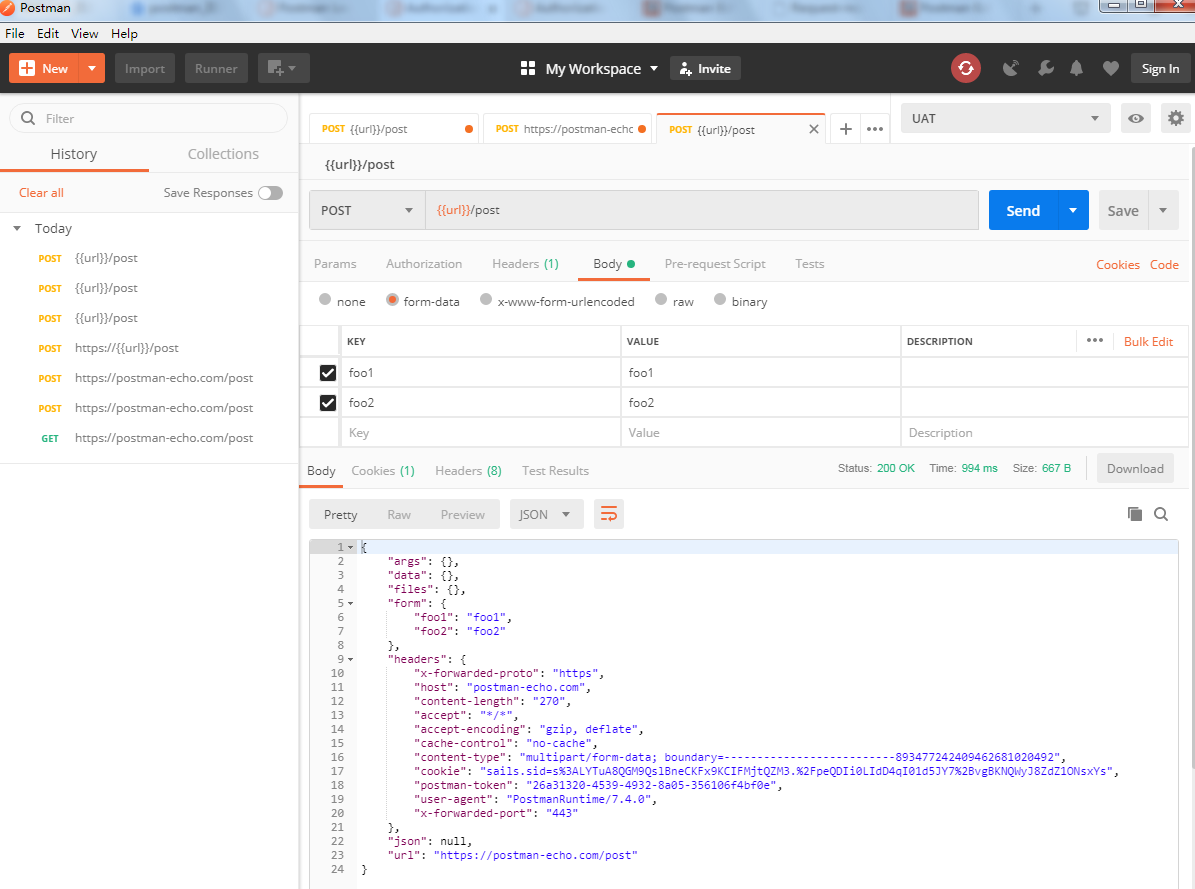
本地变量和全局变量在pre-scripts和Tests里的定义:
设置: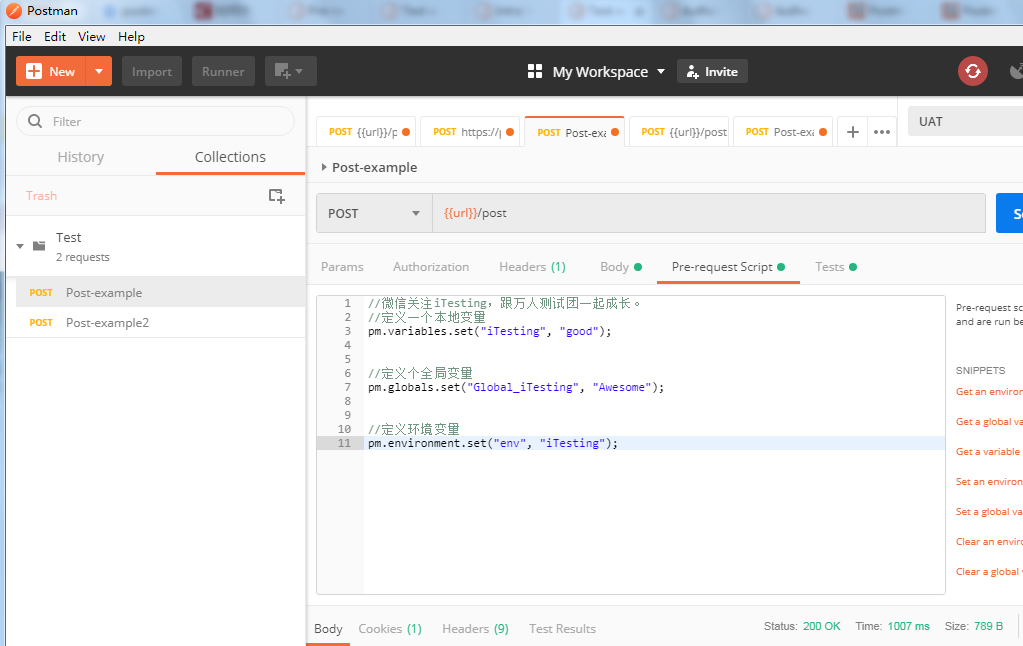
获得(我新建了一个请求):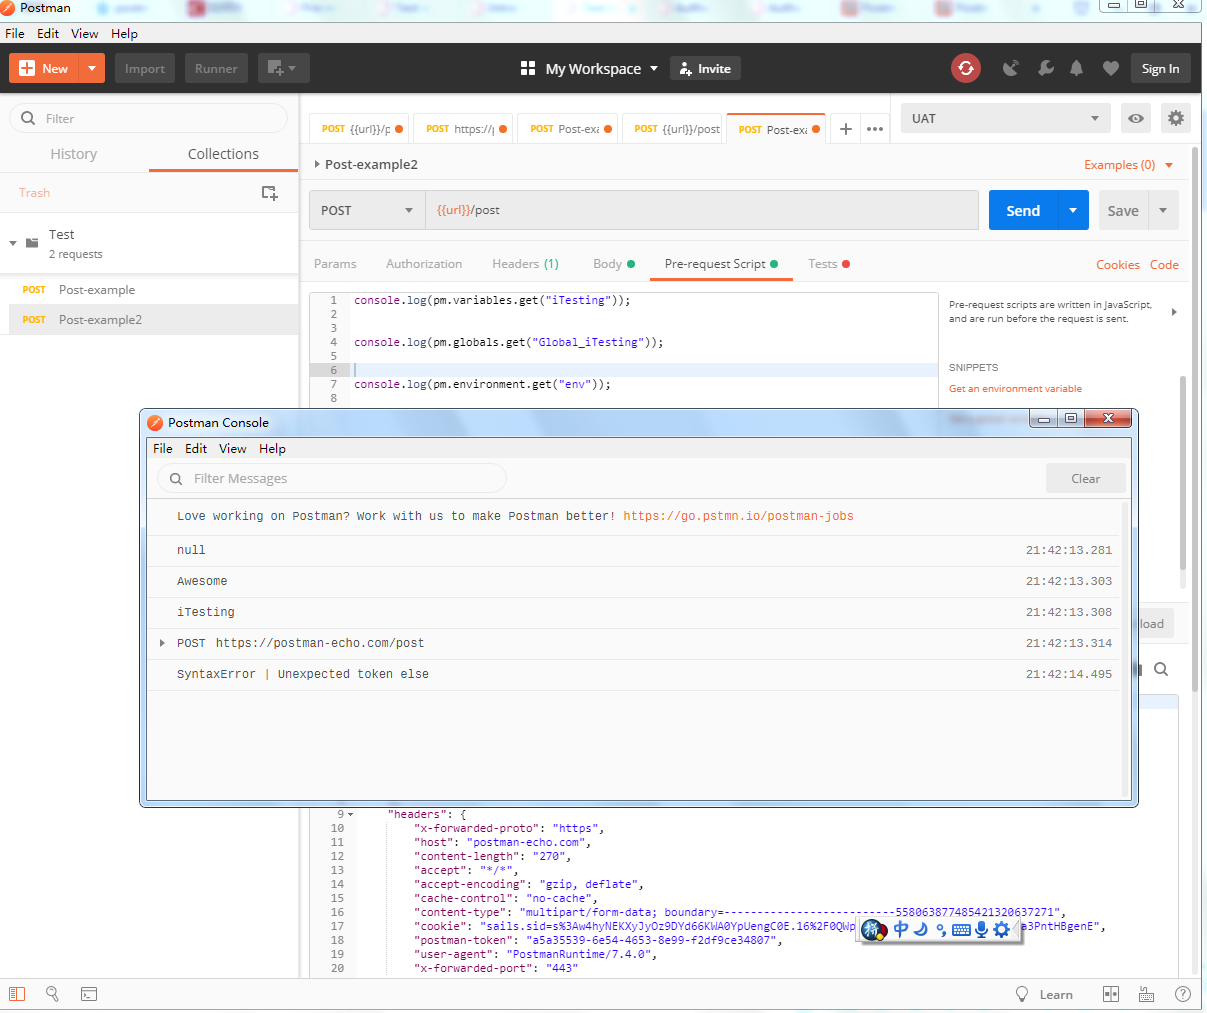
注意定义的local variables不能在其他请求里使用,但是global变量可以,定义的环境变量也是全局的,同时定义好后它可以在Environment里可以看到。
在接口测试里,我们经常需要发送一个接口后进行检查,postman给我们提供了一些通用的检查模板,在Tests里编写代码如下:
有时候某些接口入参需要一些随机数,postman也贴心的提供了如下方案:
4. Collection
什么是Collection?
A Postman Collection lets you group individual requests together. You can organize these requests into folders.
测试时候需要根据一个个用户scenario来,collection是最好的方式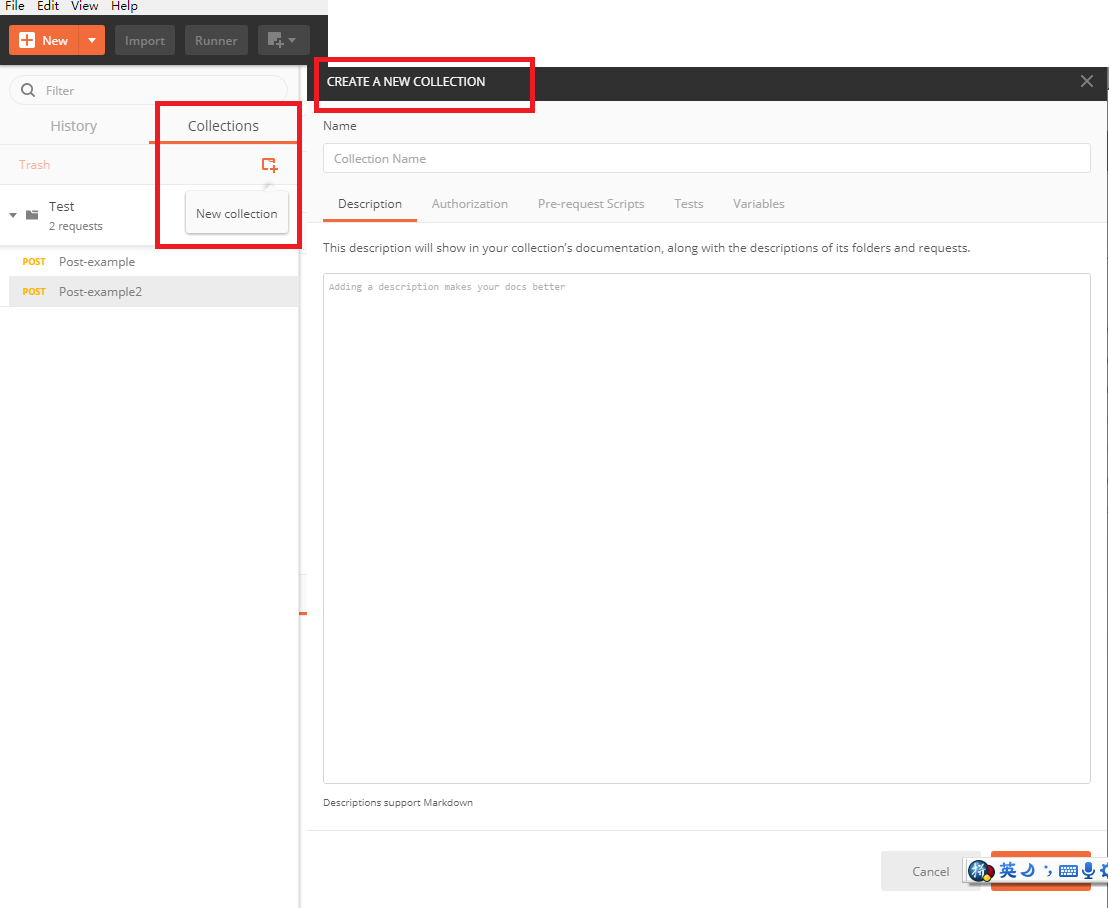
5. Conditional Workflows
创建好Collection,你可以把一个个接口请求放入Collection里,方便以后测试:
我们知道,测试的时候接口之间往往要有调用顺序的要求,如此我们只要在第一个接口请求的Tests里加入即可:
Runner里设置,运行环境, Iteration次数, 及使用数据文件。
之前我讲过数据驱动,同一个接口,需要不同数据来验证,Postman允许使用datefile。我们先来看一个请求: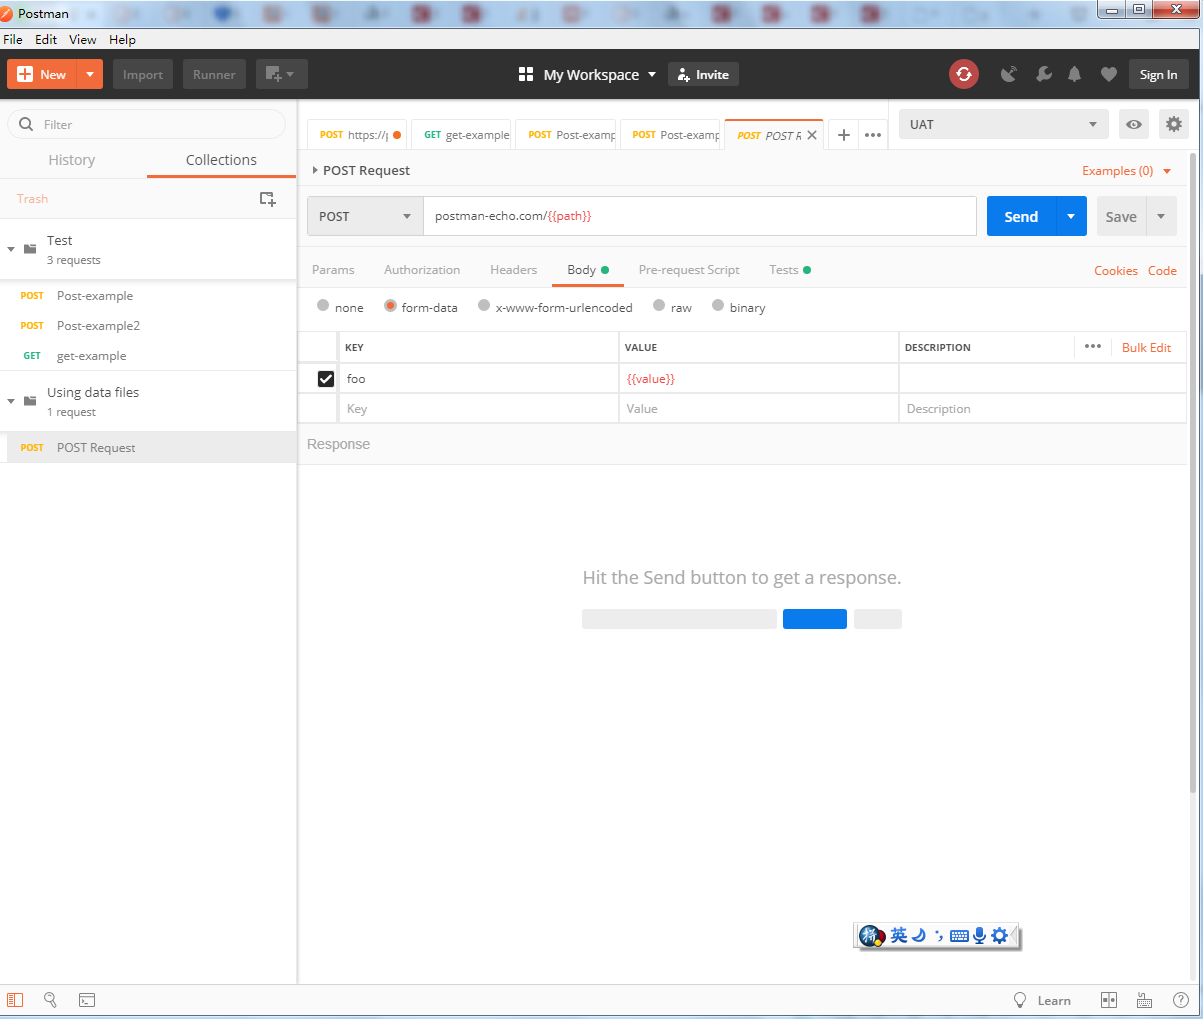
我们定义了两个参数 path 和value,在Tests里写我们的验证点:
我们再定义一个datafile, 格式可以是json,csv。
datafile也可以用csv的格式:
我们来运行下,点击菜单栏上的Runner:
配置如下,然后点击”Run with data files”: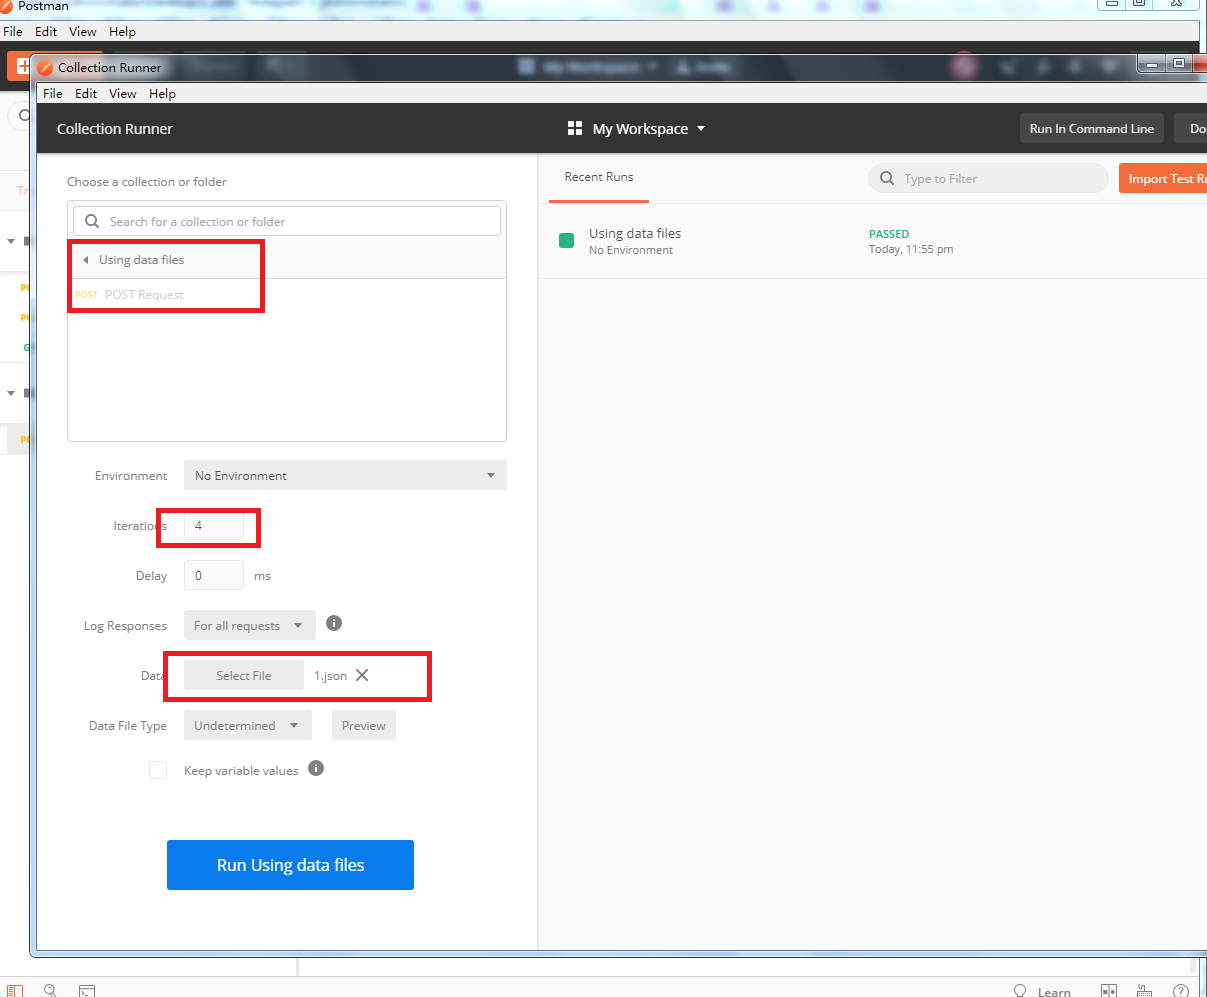
运行好后来看结果: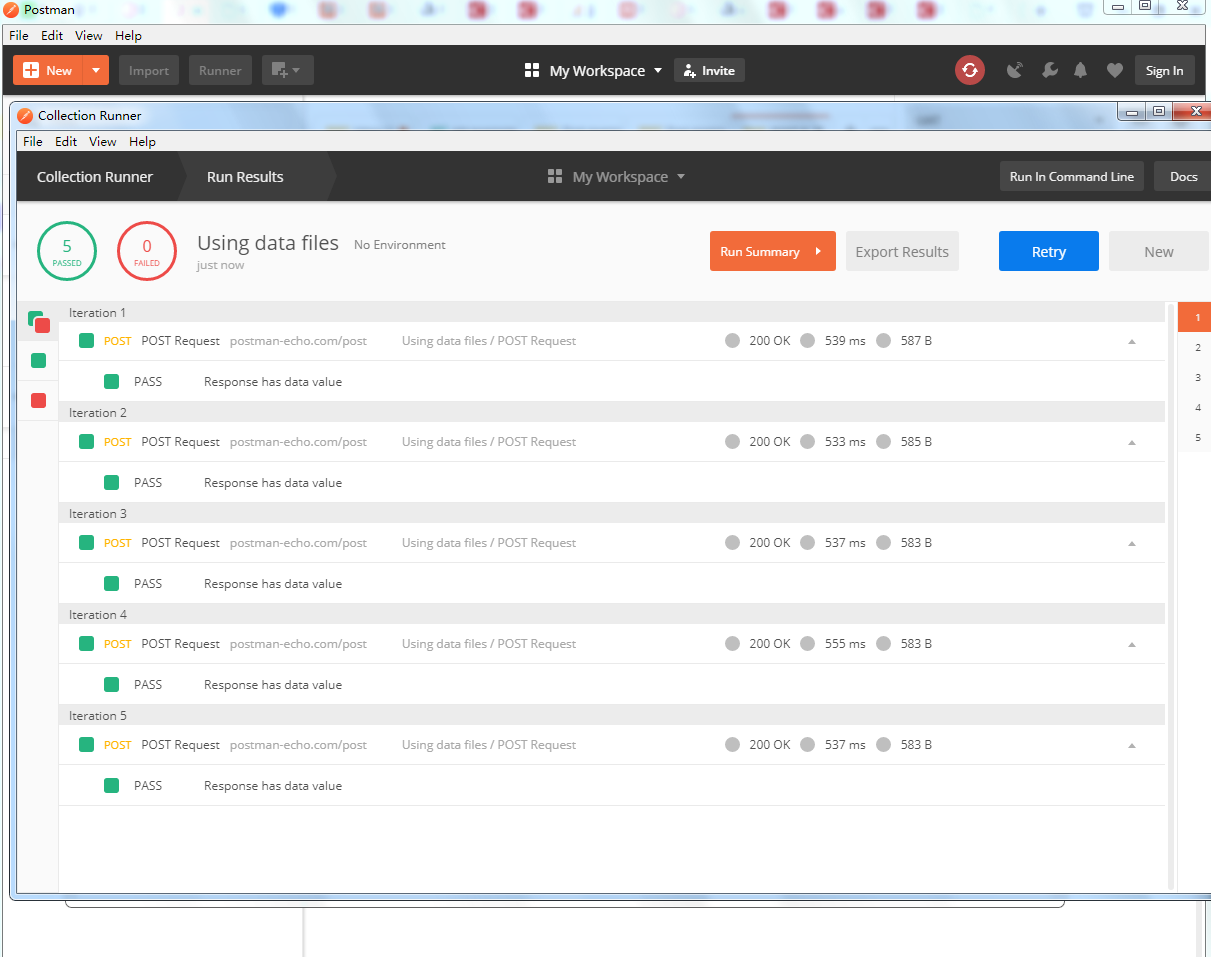
注意,Iteration需要跟datafile的一致,如果超出会用最后一个data。
6. Newman
什么是Newman:
Newman is a command line Collection Runner for Postman. It allows you to run and test a Postman Collection directly from the command line.
安装:
最简单使用:
导出Collection(mycollection.json)
command line里切换目录到你的mycollection所在文件夹:
7. 跟Jenkins集成
newman命令知道了,跟Jenkins集成就非常简单了,建立一个自由风格的项目,然后在Build选择Execute Shell即可
命令就填写我们在6里的命令即可:
注意:
1.需要在Jenkins服务器本地安装newman程序。
2.如果你设置了junit类型的报告给Jenkins用,记得在Jenkins的Post Action里选择Publish JUnit test result report,把生成的报告路径填对。
3.Jenkins其它参数配置例如定时运行请自行了解。
8. Moniter & Mock Server & API Documentation
这都是企业版的功能,也非常强大,设置来说都是三步,可以针对一个请求或者一个Collection来操作。
拿Moniter举例, New->Moniter, 我设置一个Moniter来定时运行一个Collection,也可以选择时区。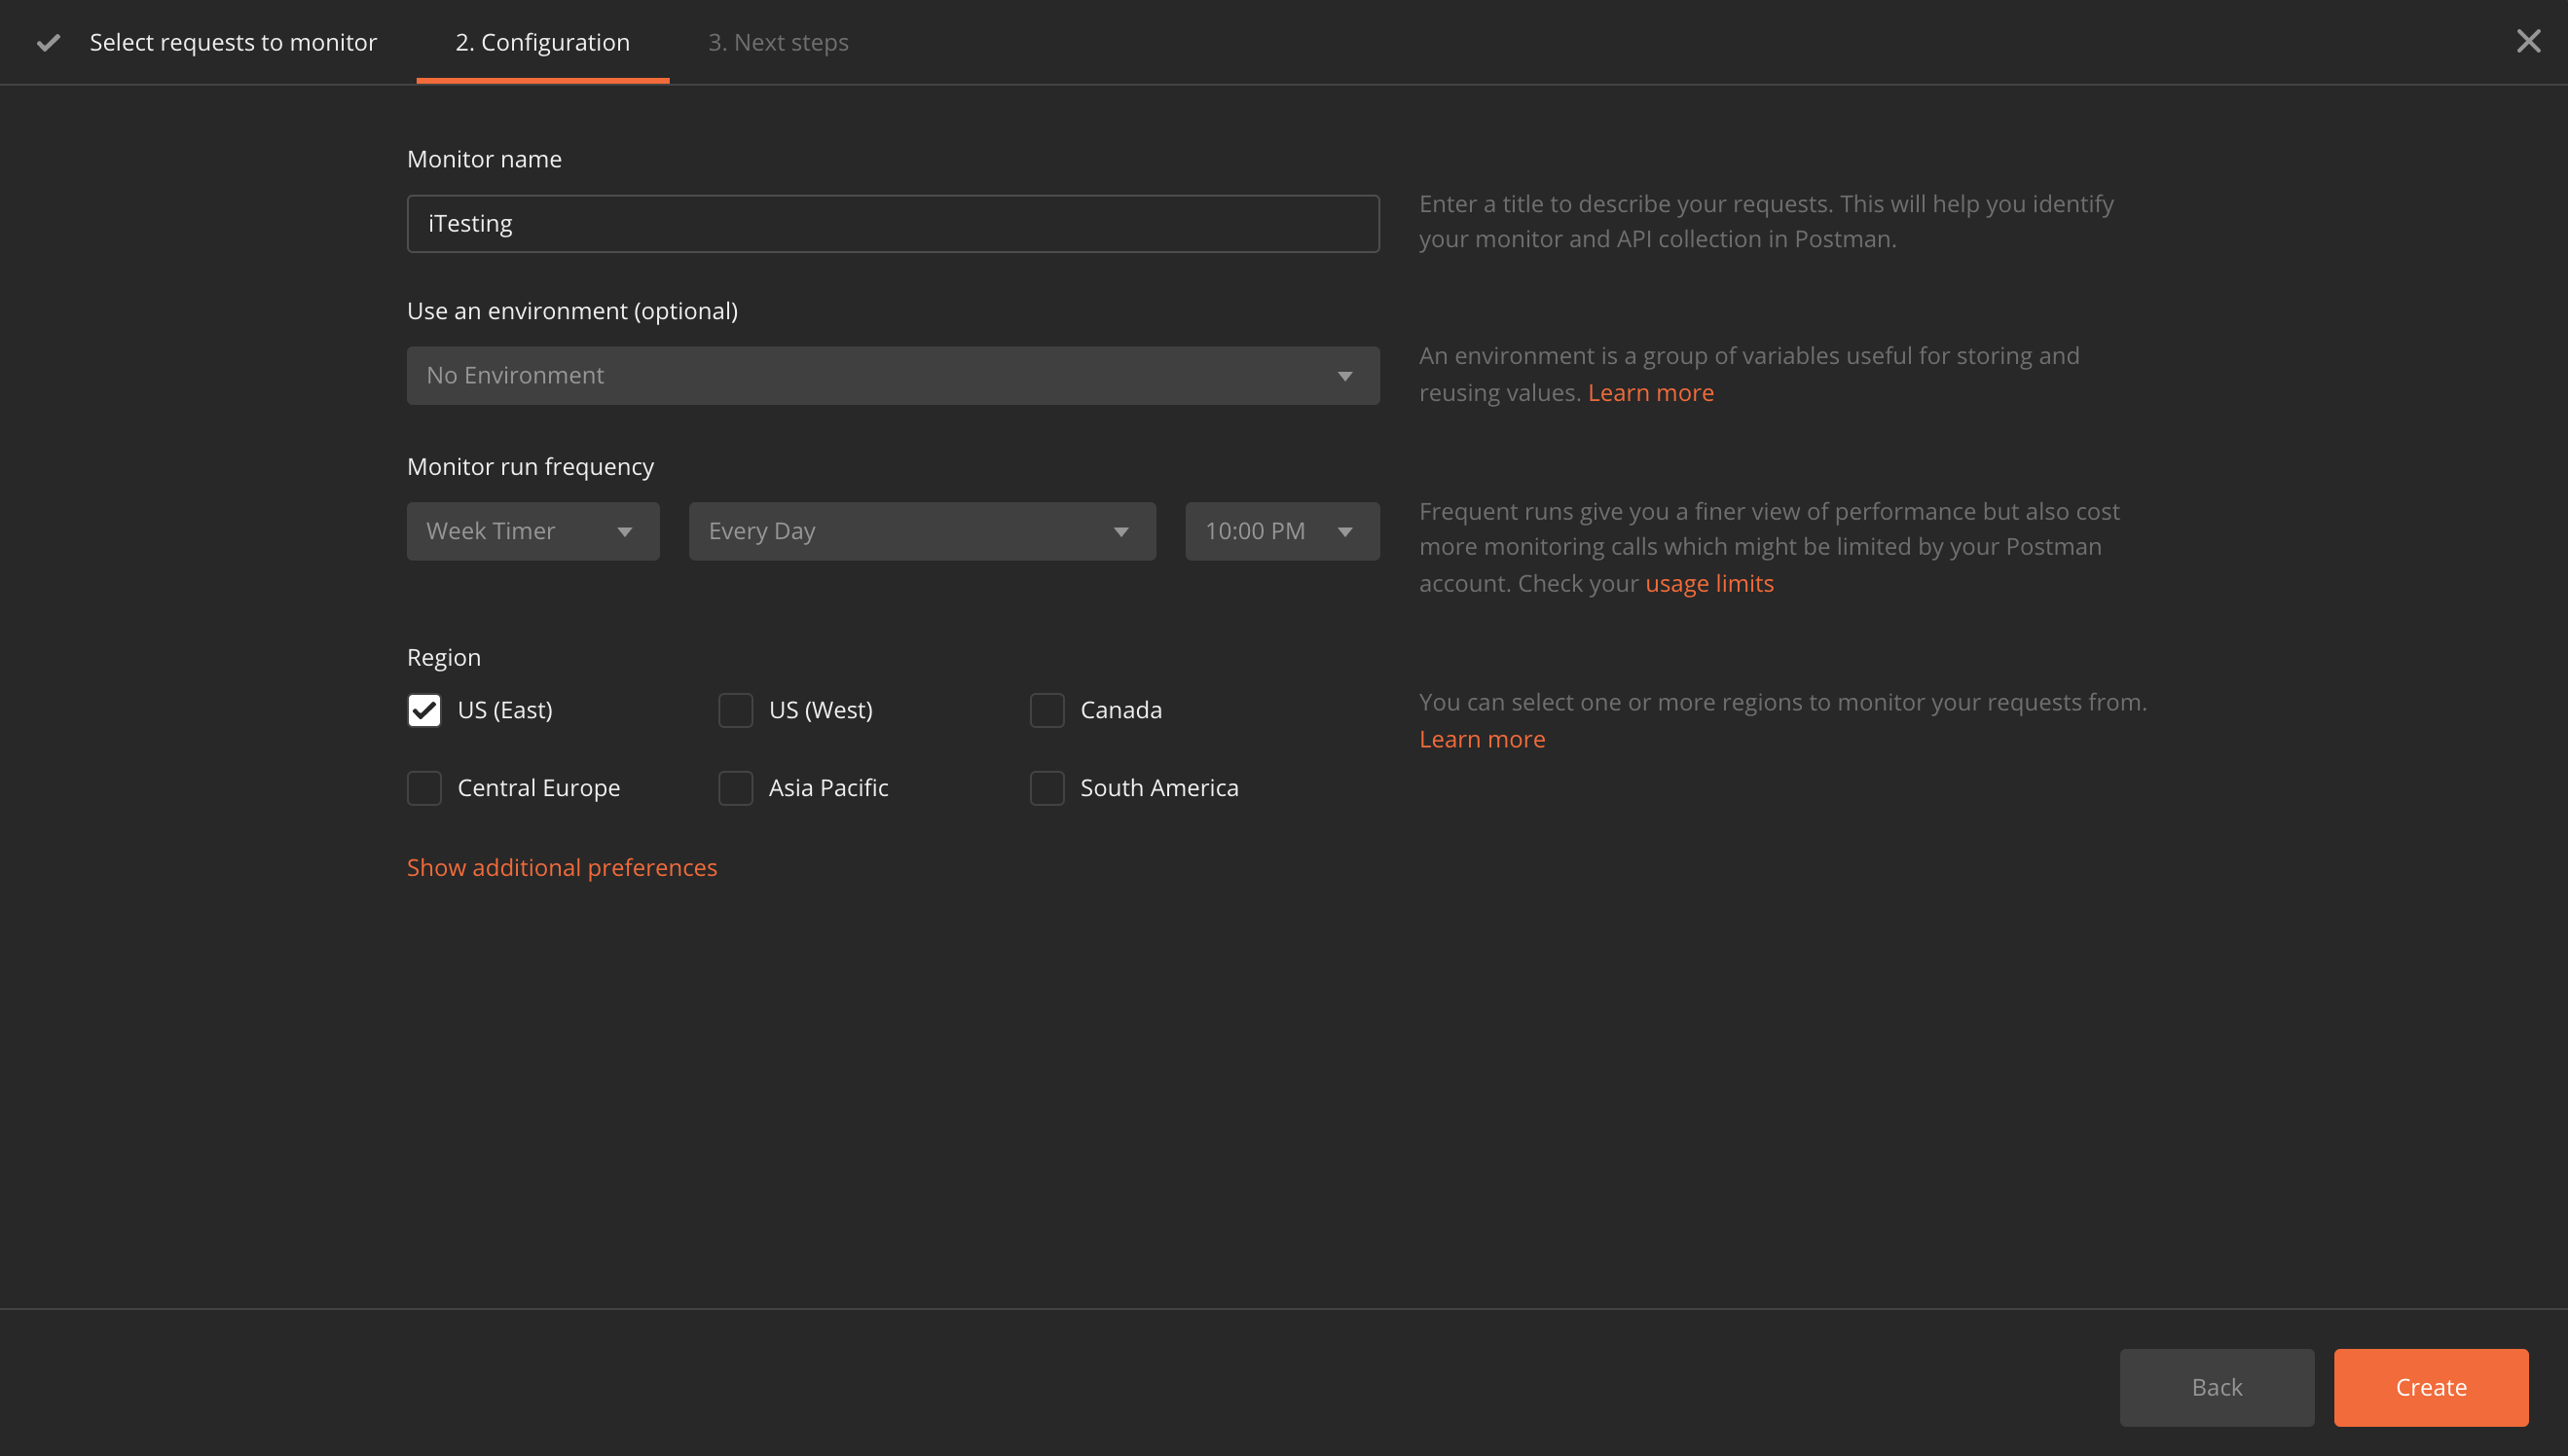
设置好后,会看到一个webdashboard,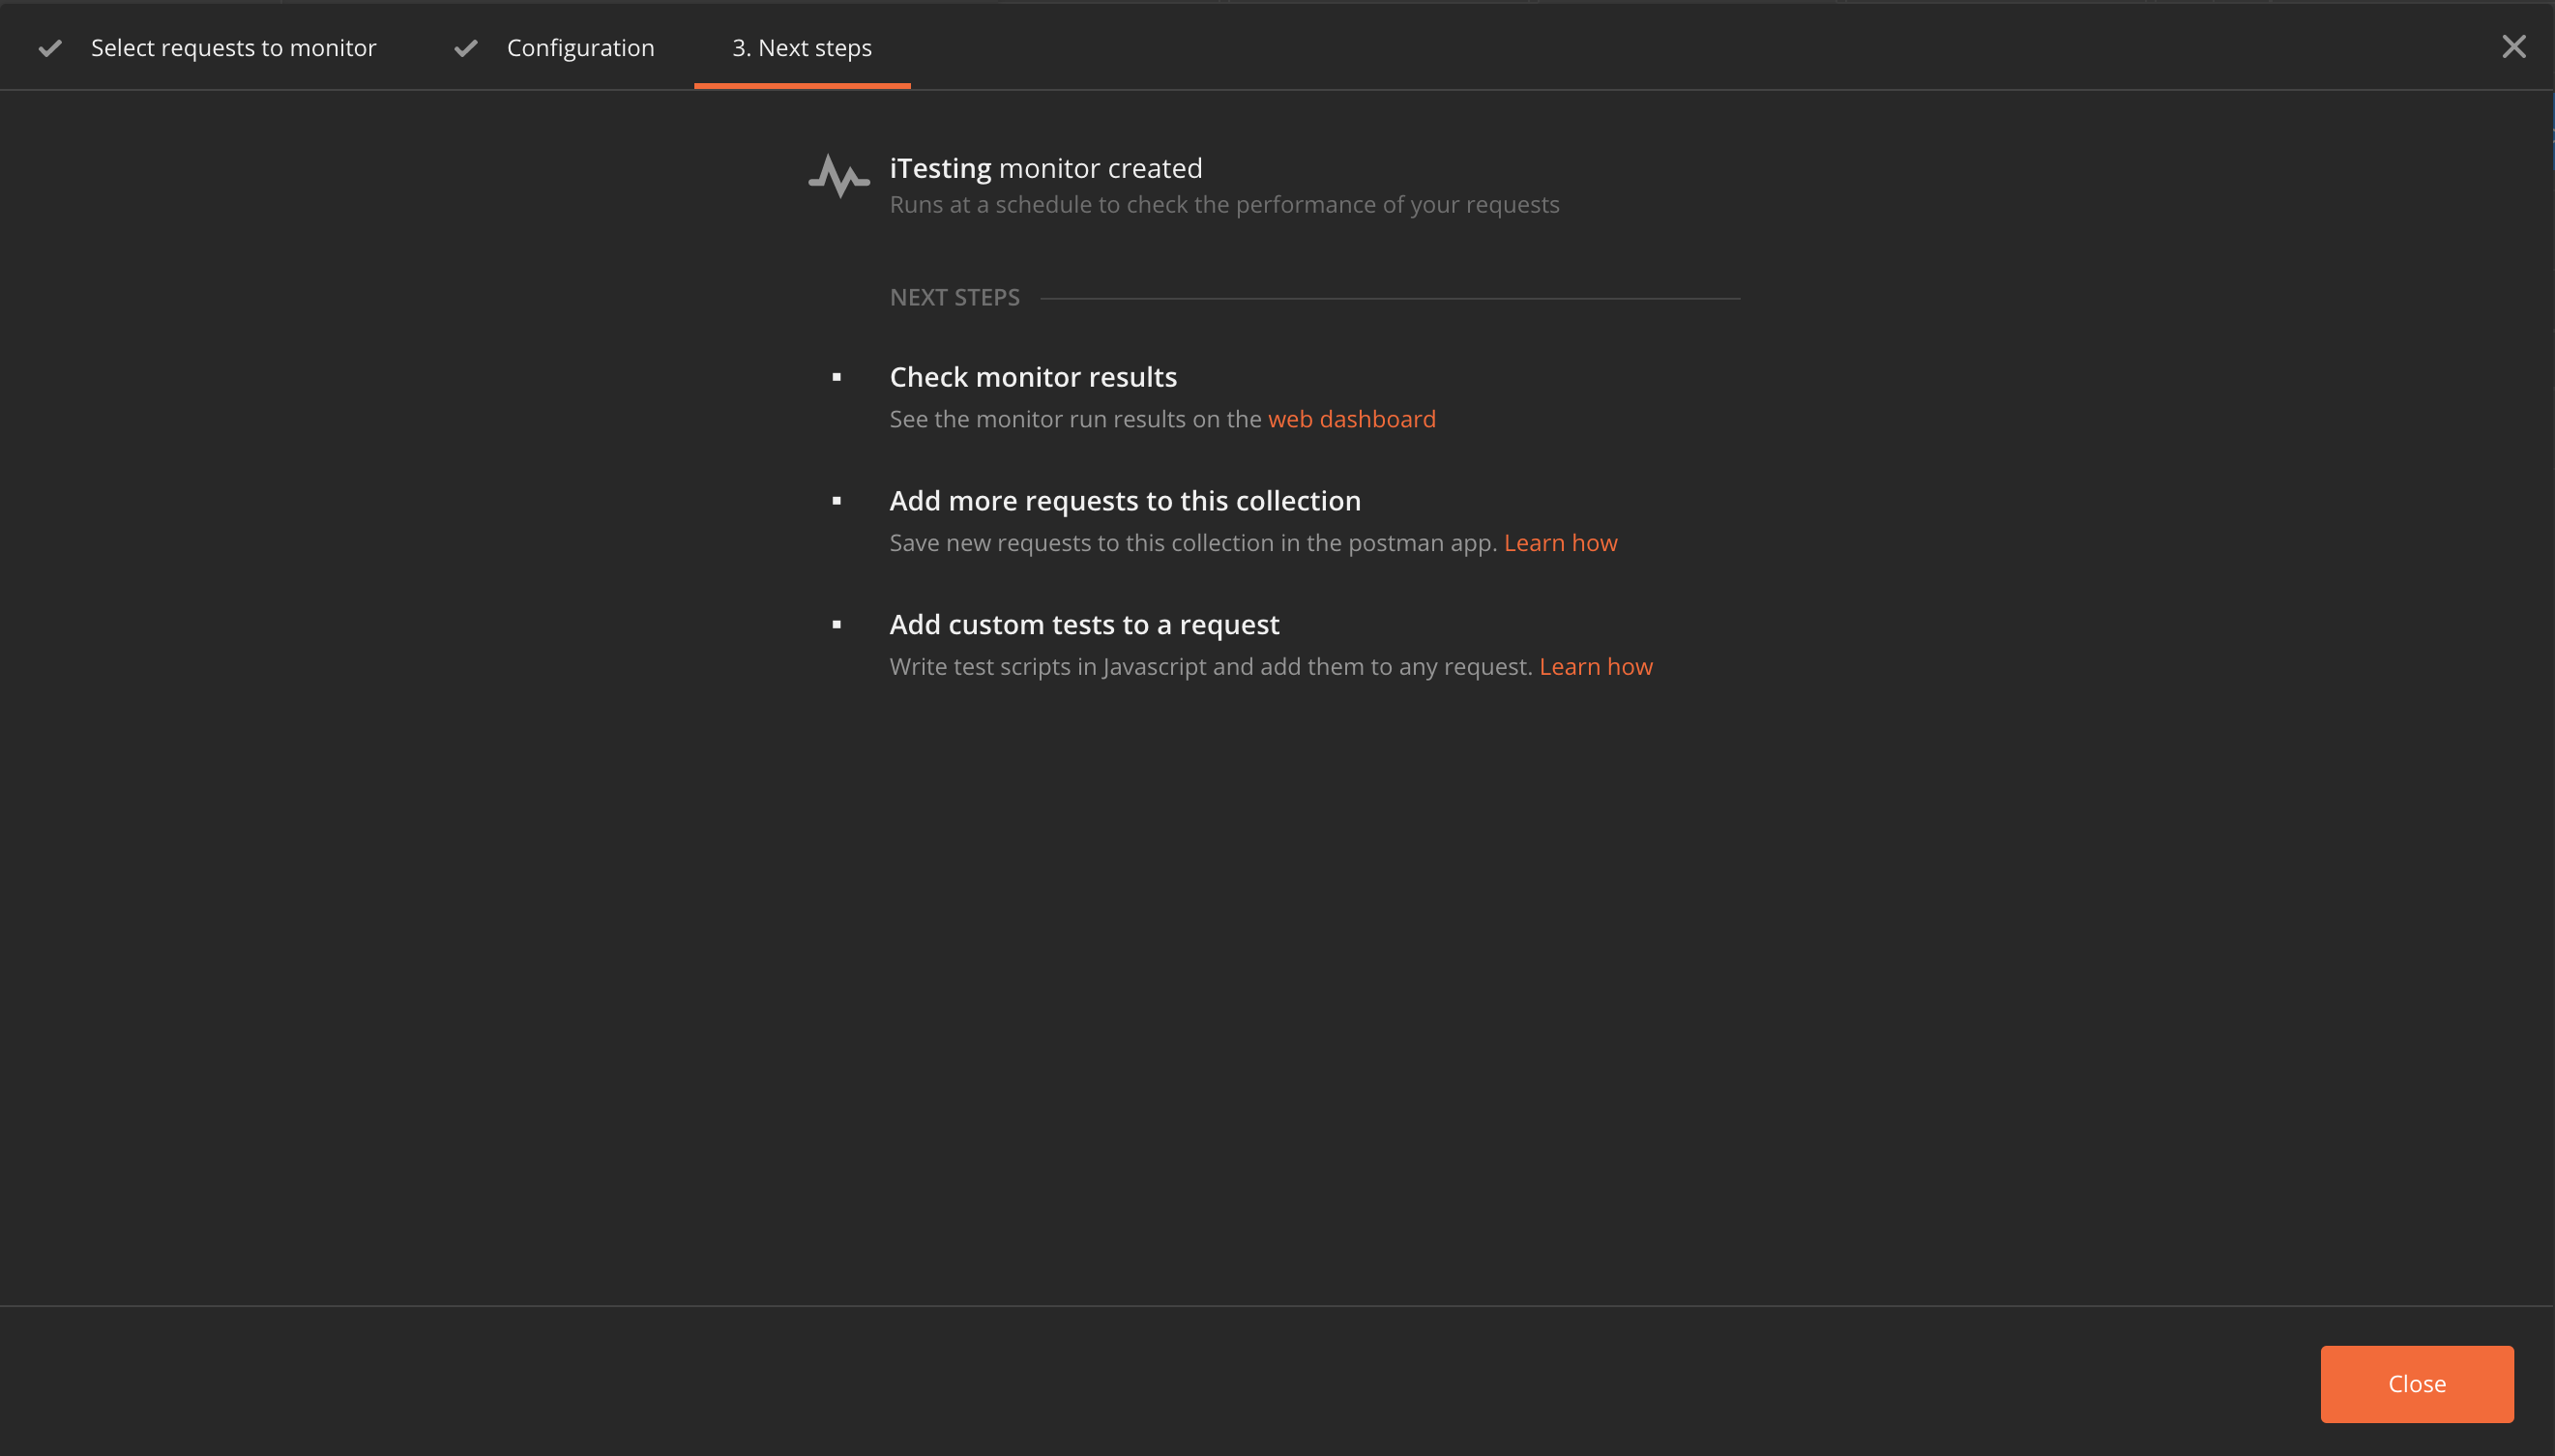
点击进去看看,里面会显示这个moniter的情况,可以手工运行也可以让它自己运行,运行成功后你的邮箱将会收到结果文件(企业版可以用邮箱登陆),这个其实就是替换jenkins的。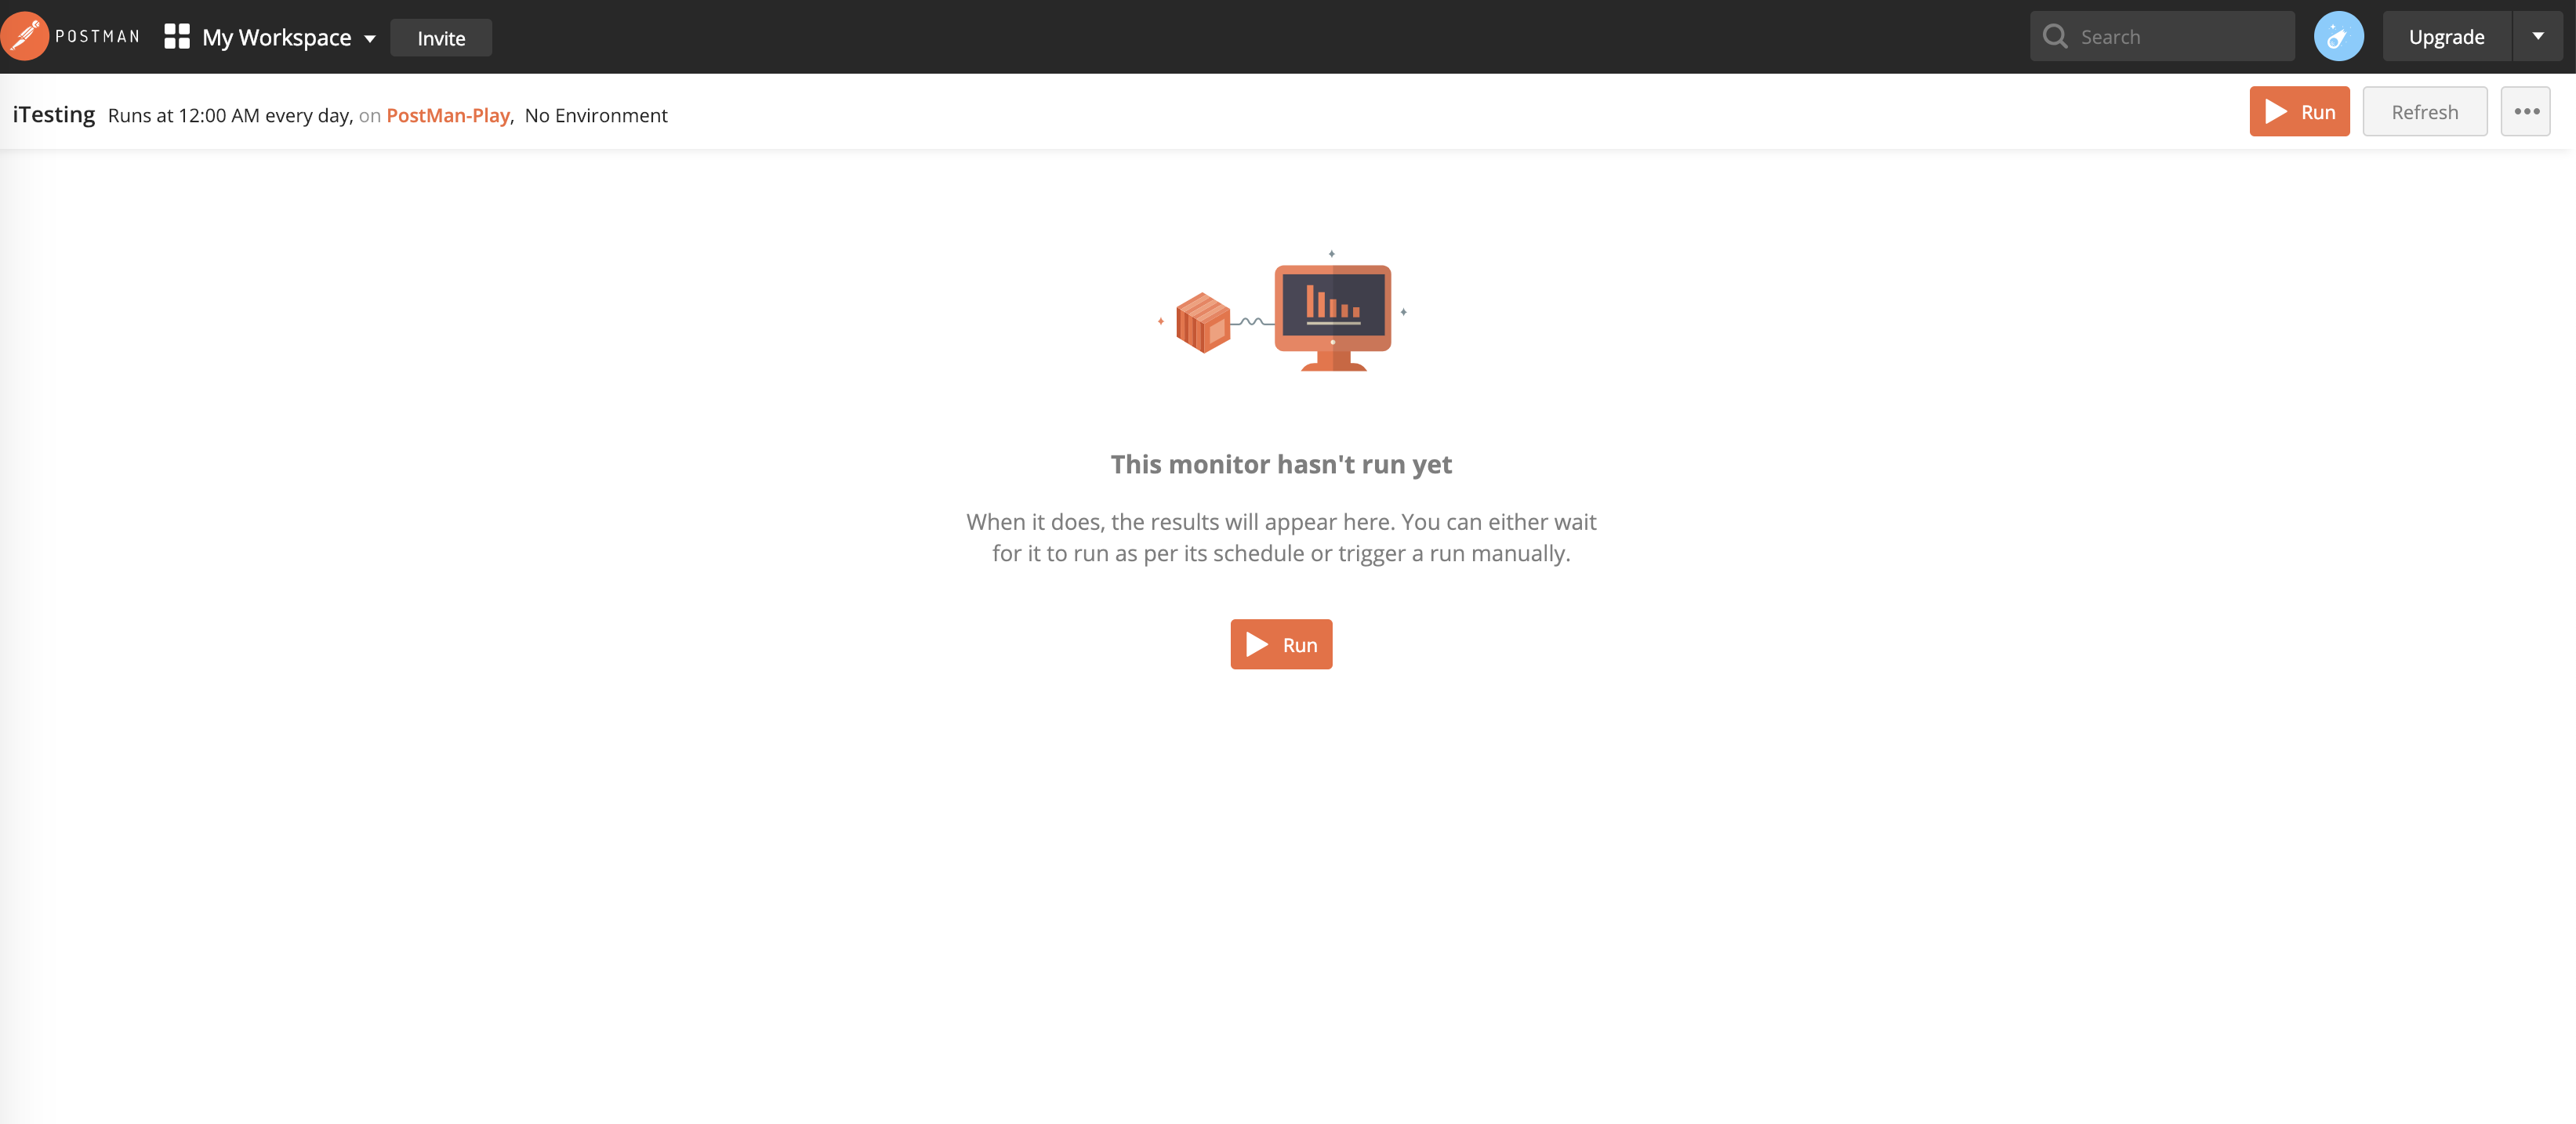
Mocker Server就是可以对某一个请求或一个Colection做mock,直接返回结果。
API Documentation 可以为一个请求或者一个collection生成API文档,postman也会提供你一个网址访问。
因为绝多数朋友不会用专业版,这里我就不详细介绍了。
再很长的一段时间内,手工测试绝对不会消失,那么如何高效的开展手工测试,提高个人生产率,从而对业界平均生产率产生价值差,就是我们不懈的追求了。
希望大家花个一个小时左右通读本篇,彻底玩转手工接口测试。
还有几分钟马上2019年了,我预祝大家生活有追求,技术不落伍,祝大家新年快乐!
(新的一年,请继续关注iTesting,多点赞多转发,帮助更多的人提升自己。)